
Even if you haven’t tried flow painting or acrylic paint pouring for kids, it’s definitely something to add to your list.
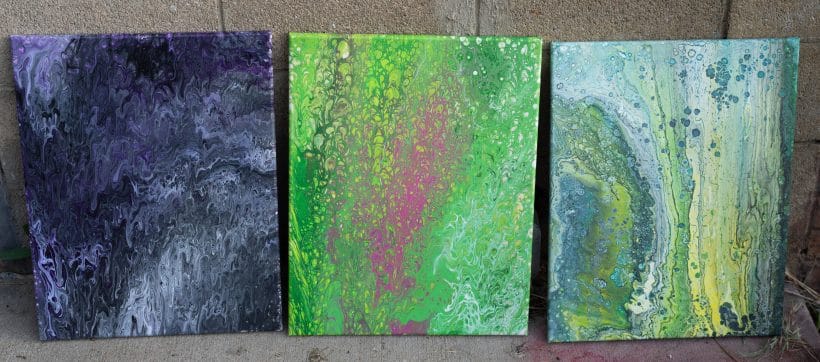
This type of painting is usually very abstract, colorful, and interesting to look at.
The best thing about flow painting is there aren’t very many rules you need to follow. There are a couple of fundamentals you need to understand, but the art offers a lot of flexibility.
This is a great paint pouring activity to do with kids because it’s simple, fun, and will usually yield good results.
In the video below, Al Perry shows us some simple techniques to get started with flow painting. Al Perry is a retired professional photographer (you can find some of his older photos here) who has dabbled in different painting and drawing techniques.
Related: Unique Slime Recipes
Related: DIY Paw Patrol Soap
Flow painting is his latest and greatest hobby, and I think you will appreciate his quirky humor that goes along with the tutorial. He has done flow painting tutorials for anything from ten-year-old birthday parties to bridal showers with great success.
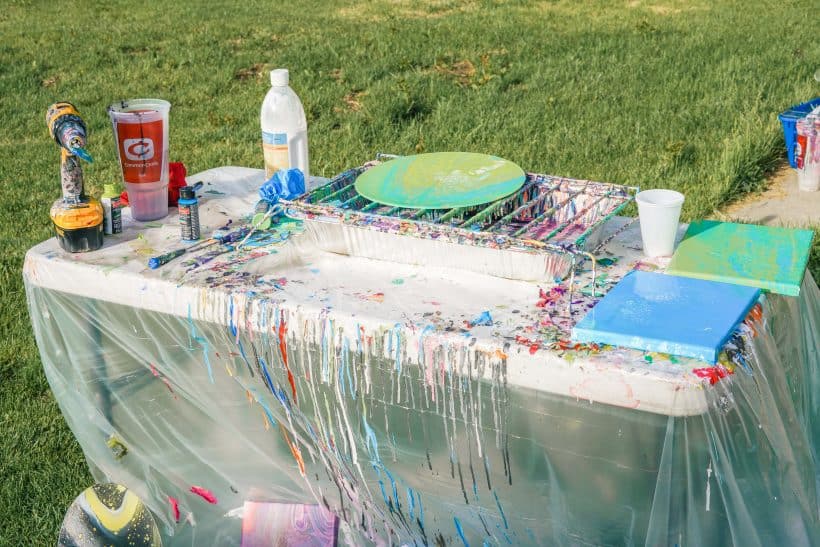
Keep in mind, it’s going to get messy!
There are affiliate links in this article, you can read more about this in my disclaimer.
Supplies
8 x 10 Canvas ![]() (you can use other surfaces, but they must be primed first)
(you can use other surfaces, but they must be primed first)
Primer![]() (if you are using a surface other than a canvas)
(if you are using a surface other than a canvas)
3 different colors of Acrylic Paint![]() (using 2 oz containers will yield enough for an 8×10 canvas)
(using 2 oz containers will yield enough for an 8×10 canvas)
Water
Popsicle (craft) Sticks ![]() for mixing (you can also use a drill
for mixing (you can also use a drill![]() )
)
Instructions
1. Be prepared for a mess. Put on gloves, and do this project in an area that you don’t mind getting a little messy.
2. Pour 2 oz (1 container) of Acrylic paint into a plastic cup. Add 3-4 oz of Floetrol, and 1-2 oz of water to your cup. You want your mixture to have the same consistency of heavy cream. If your mixture seems too thick, you can add a little bit more water.
3. Stir and stir your mixture. While stirring, it’s important to try and avoid getting air bubbles in your mixture. Some people choose to use a popsicle stick, as this decreases the likelihood of bubbles forming, but this is very time-consuming. If you aren’t worried about the potential for air bubbles, you can also use a power drill on low power. Personally, I don’t have the time to sit and stir and using a drill will usually yield great results and minimal air bubbles.
4. Repeat step 1 and 2 with the remaining plastic cups and containers of acrylic paint you chose.
5. Take your last plastic cup, and pour your white paint into it first. White paint is heavier than other colors of paint, and so it usually sinks down to the bottom. By pouring it first the white will be on top once it hits the canvas, and so you are more likely to have some show through.
6. Repeat step 4 with your other colors of paint in whatever order you would like. Keep in mind the amount you pour into this cup doesn’t matter, so if you only want a hint of blue, don’t pour a lot of blue in your cup.
7. Quickly flip the cup holding all of your paint over onto the middle of the canvas. You want this to happen as quickly and smoothly as possible.
8. Slowly lift the cup that had the paint straight up and discard.
9. Let the paint flow down your canvas. You can choose to tilt your canvas a specific way to get the colors to flow, or you can simply tilt it downwards until your paint covers the canvas.
10. Let it dry for at least 12 hours. Do not try to dry with a fan or your paint will crack.
**A couple more pro flow painting tips
Because this can get really messy, make sure that you wear gloves and protect your counters and floors. If it’s warm enough, it makes a lot of sense to do this activity outside.
If you finish your painting and feels it looks too plain, a Blow Torch![]() can help pull some of the under colors out. Aim your blowtorch around 8-10 inches away from your painting while it is still wet. Don’t get too much closer or your paint could burn.
can help pull some of the under colors out. Aim your blowtorch around 8-10 inches away from your painting while it is still wet. Don’t get too much closer or your paint could burn.
Make sure when choosing your colors that they will look nice together. Three lovely colors that look great on their own may clash when put together.
Keep in mind the piece you see while your painting is wet may look very different once it is dry.
If you don’t like the finished product, consider repouring over sections to change it up.
Be creative! You can create a painting with something simple like a record![]() , which can later turn into an abstract-looking clock. Try turning your canvas around in different ways to have the paint flow differently.
, which can later turn into an abstract-looking clock. Try turning your canvas around in different ways to have the paint flow differently.
WHAT IS PAINT POURING?
Pour painting is a specific method of acrylic painting. Instead of using conventional tools like paint brushes, fluid paints are poured directly on a surface. The canvas is then tilted to move the paint around.
The colors will naturally blend together as they come into contact with each other. The result of a dried acrylic poured painting is different than it appeared wet because of the paint interaction.
WHAT IS POURING MEDIUM FOR ACRYLIC PAINT?
A pouring medium helps the paint be a thinner, flowing consistency while maintaining the vibrancy of color, texture, and opacity in your finished painting.
Floetrol is one of the most common things used as a medium for acrylic painting, but it is certainly not what is used by most professionals.
There are professional pouring mediums such as Liquitex Pouring Medium. This is one of the most popular acrylic pouring mediums available on the market, and you will yield better results with it.
Keep in mind paint pouring with kids doesn’t need to be “fancy”, so I would stick with the Floetrol personally.
CAN FLOETROL BE USED WITH ACRYLIC PAINT?
Floetrol is a paint conditioner that can be used for flow painting. It is technically NOT an acrylic pouring medium.
Instead, it’s a paint additive that helps reduce brush marks and improve flow and performance of paint.
If you enjoyed this post, please share or pin it for later!

Leave a Reply